Introduction
In this article we will go over what AppVeyor is, what we can use it for and how to install it on our Ubuntu server from scratch to build our DotNet Core and angular projects.
This article assumes you have some knowledge of Linux, SSH and how to run commands. Once it’s setup you will manage it through the web interface.
What is AppVeyor
AppVeyor is one of the most popular CI/CD solutions out there, that is easy to use as well as manage for all your projects. AppVeyor used to live only in the cloud where you pay a subscription fee to use the service, but now they have made a OnPremise version that is free to setup and use for a single team with unlimited private and public projects! AMAZING!
Let’s get started!
Setting up Ubuntu
We will use Ubuntu 18.x in this guide. And even though we could use “Process” building, where we build everything using the Ubuntu system we are running on, this posses some problems with packages like Node where the AppVeyor system can become unusable afterwards! so we will use Docker for all our building needs in this article, it’s very easy and then it’s completely containerized and separated from the running OS.
I am currently running my AppVeyor on a $5 Cloud Server with Hetzner.
With 4 GB RAM, 2 vCPU cores and 40 GB NVMe SSD disk space.
Make sure we are up-to-date!
copy/paste these line by line into the SSH console:
apt-get update && apt-get -y dist-upgrade
apt-get -y install mc curl zip unzip htop
Note you should always secure your installation as per best practice!
Installing AppVeyor CI
Now that our OS is up to date and ready we can go ahead and install everything we need for AppVeyor itself.
Installing AppVeyor packages
Installing AppVeyor is as simple as running these commands:
cd /tmp
curl -L https://www.appveyor.com/downloads/appveyor/appveyor-server.deb -o appveyor-server_latest_amd64.deb
dpkg -i appveyor-server_latest_amd64.deb
To make sure it is installed we will see the installed AppVeyor version number with this command:
/opt/appveyor/server/appveyor version

Log into your new AppVeyor installation
For Let’s Encrypt SSL you need to have a public facing IP address and domain name pointing an A-Record at it.
Go to the address where your server lives.
Note there is no HTTPS yet!
http://myserver.com
From here you will be asked to create a new user with name, email and password.
Enable HTTPS with Let’s Encrypt
Goto: System → Settings → HTTPS
Here we will switch to “Let’s Encrypt certificate” under HTTPS and we will add the “s” in https:// under application public url.
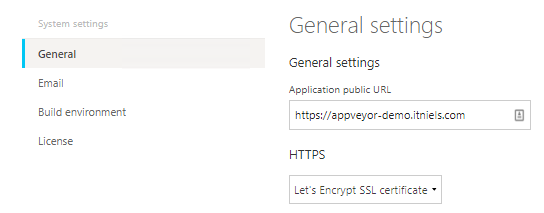
Now fill in your information as accurately as possible in the fields below to create a CSR that will be your certificate.
Once you are done click Update at the bottom and give it just a little time (it will look like nothing is happening) and then it will redirect you to the https version of the site with a padlock in the browser. That’s it 👍
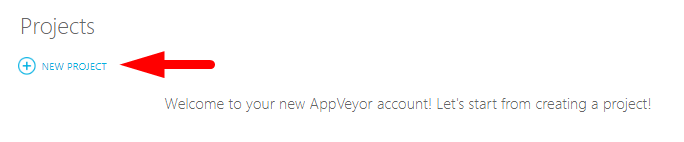
Setup repositories
Now you can setup your repositories like Github, BitBucket, etc to allow access and list and add project from them into AppVeyor.
Upgrading AppVeyor
Once in a while there will be an update to AppVeyor and we need to keep it up-to-date of course.
Here is a one-line command to update the AppVeyor installation:
/opt/appveyor/server/appveyor version && cd /tmp && rm -f appveyor-server_latest_amd64.deb && curl -L https://www.appveyor.com/downloads/appveyor/appveyor-server.deb -o appveyor-server_latest_amd64.deb && dpkg -i appveyor-server_latest_amd64.deb && /opt/appveyor/server/appveyor version
 Hi, my name is Niels, I am a passionate software developer from Denmark with a love for coding and solving real-world problems! I taught myself C# back in 2012 in my spare time and I loved it! I went on and graduated from Computer Science in 2016 where I got hired by